Saturday, December 10, 2011

Pellet Grill Baked Apple Crisp

Nothing warms me up better on cold day than a piping hot helping of apple crisp.  I recently whipped up a batch, this time baking it on my Yoder Smokers pellet grill.  Here's how it looked coming together.

Granny Smith apples with cinnamon, sugar, and flour

All mixed up, ready for topping

The topping mixture

Baking on the Yoder.  Looking good!

Apple crisp, hot off the grill!

Plated up with some vanilla bean ice cream.  That's some good eats!

This is one of my favorite desserts.  The Granny Smith apples were a little too mushy for my tastes.  I typically use a Jonathon or Honeycrisp for my baked apple recipes.  Here's the recipe I like to use:


Fill 9x9 buttered dish with chopped, fresh apples (jonathan, honey crisp, etc.), 6-8 apples,

Mix the following into the apples:

1 c. sugar
1 T. flour
1 t. cinnamon

In a separate bowl, mix together the following ingredients for the topping until crumbly

½ t baking soda
¾ t baking powder
1 c brown sugar
1 c flour
¾ c oats
¾ c butter melted

Spread the topping mixture over the apples. Bake for one hour at 350 or until brown.  Serve hot with a generous scoop of vanilla ice cream.


Saturday, November 12, 2011

Chicken Marsala

I love a good Chicken Marsala.  There is nothing like that wood-fired chicken, seasoned to perfection, all topped off with a rich Marsala wine sauce.  It's making me hungry just talking about it, so enough!  On with the food!

Chicken Breasts rubbed in olive oil, seasoned and grilled over direct heat on the Yoder Pellet Grill

Grilled to perfection!  Check out those grill marks, courtesy of the Grill Grates product

All plated up with Marsala sauce, garlic mashed potatoes, and peas.  We like a few extra mushrooms in ours ;-)

And here's the recipe:

Marsala Sauce:

1/3 cup butter
2 slices prosciutto, diced
2 teaspoons minced shallots
2 teaspoons minced garlic
8 oz. fresh mushrooms, sliced
1/4 cup marsala wine
1/4 teaspoon ground black pepper
1 cup chicken stock
2 teaspoons corn starch
1 teaspoon minced fresh parsley
2 tablespoons heavy cream

Chicken Spice:
1 1/4 teaspoons salt
1 teaspoon ground black pepper
1/2 teaspoon dried oregano
1/2 teaspoon dried thyme
1/2 teaspoon dried parsley
1/4 teaspoon marjoram
1/4 teaspoon garlic powder
4 chicken breasts
olive oil

Melt butter over low heat in a medium saucepan.  Turn heat up to medium/high to saute the prosciutto in the melted butter for about 2 - 3 minutes (be careful not to burn butter), add shallots and garlic and saute for about 30 seconds. Add marsala wine, simmer for another 30 seconds or so, then add mushrooms and black pepper. Simmer over medium/high heat for 5 minutes or until the mushrooms are cooked down. Dissolve corn starch in chicken stock. Add stock to the saucepan and simmer for an additional 5 minutes. 
Add parsley and cream to the sauce and simmer for 3 - 4 minutes or until thick. Remove from heat, cover until needed. 

Set up your pellet grill for direct heat or preheat your gas/charcoal grill if that is your weapon of choice. Combine ingredients for the chicken spice in a small bowl. Use your thumb and fingers to crush the spices in the bowl to make a finer blend. Brush each chicken breast generously with olive oil. Rub on spices and grill until chicken is done. Top off the chicken with some Marsala sauce and you are in food heaven!


Saturday, November 5, 2011

Oktoberfest Burgers

Wow, it's been a long time since I've been able to share some good BBQ recipes with you all! Not to worry.  I'm still alive, and still smokin' and grillin' up a storm!  With the hustle and bustle of fall winding down and the Thanksgiving and Christmas Seasonings fast approaching, I've been able to sneak in a few cooks.

We finished off the month of October in true Oktoberfest fashion, Dark Side BBQ style with my version of an Oktoberfest Burger!


My version of the Oktoberfest Burger uses a homemade pretzel bun (recipe below), a half pound patty of ground chuck, melted smoked Gouda cheese, all topped off with onions sauteed in Free State Brewery's Octoberfest, and finished off with some Inglehoffer  Stone Ground Mustard.

Stay tuned as I have a laundry list of good food for the grill to share for the holiday season.  Next, I've got a great Chicken Marsala recipe to share for the grill using the Grill Grates product for direct cooking on your pellet grill.  Until then, keep on smokin'!

Here's the recipe for the homemade pretzel buns (definitely a labor of love, but worth the effort!):

1 1/3 cups warm water (105 degrees or so; just warm enough to activate the yeast
2 T warm milk
2 1/2 t active dry yeast
1/3 c brown sugar
2 T butter, melted
4 cups of all purpose flour

In a small bowl or measuring cup, combine 1/3 cup of the water with the the yeast.  Let that stand until foamy so we know the yeast is activated.

In the bowl of a stand mixer, fitted with a dough hook, add the yeast mixture, additional cup of water, milk, sugar, and butter.  Stir until sugar is dissolved.

Add the flour, a little at time, and mix until it forms a pliable dough ball.

Turn the dough out on to  a lightly floured surface and need for about two minutes or so.  Roll this out into a log, approximately two feet in length and cut into twelve pieces.  Place the rolls on a cookie sheet lined with parchment paper.  Cover the dough with a towel and let it rest for 10 minutes.

Form the dough into rolls, and cover them again with a towel and let them rest for 30 more minutes.

At this point, preheat the oven to 425 degrees.  In a large stock pot, bring 2 quarts of water to boil, and add half a cup of baking soda.  Make sure your stock pot is big enough, so when you add the baking soda to the water, it doesn't foam over the pot and all over your stove.

Drop one or two rolls into the boiling water for 30 seconds, turning once.  Return to your cookie sheet.  Sprinkle the rolls with a healthy amount of kosher salt.  Bake them for 8 minutes or more, until they are nice an brown, like a pretzel.

Let them cool, slice and pile on your burger toppings.  These are very versatile rolls, so you could come up an endless number of possibilities of burgers or sandwiches.

Monday, September 5, 2011

Smoked Shrimp

Jeff Phillips over at Smoking-meat.com recently published a great technique for smoking shrimp.  I'm a big shrimp fan so I had to try this out.  I experimented with a pound of large raw shrimp, peeled and deveined.  Those were tossed with a little olive oil and some rub.  I used John Henry's Texas Pig Rub, which gave a great flavor to the shrimp.

The shrimp marinated for about an hour, placed in a foil pan with a half stick of melted butter, and thrown on the Yoder to smoke at 225 until they are pink.  This a tell-tale sign the shrimp are done.  This shouldn't take more than 10-15 minutes so keep an eye on them.  I love how these tasted with just a nice hint of smoke.  Here's a few pictures of the process.

The shrimp marinating in olive oil and rub

Panned up with butter and ready for smoke

The finish product (notice the pink color)

Plated up with some fried okra and fresh Colorado peaches...Mmm!

Saturday, August 13, 2011

The Yoder Smokers Manufacturing Facility

I recently had the privilege of making a road trip to tour the Yoder Smokers manufacturing facility up in Yoder, KS.  It was really fun to see where some of the finest grills and smokers are designed, tested, and produced.  I got the spend the day with Don Cary and Joe Phillips of Yoder Smokers, Andy Groneman from Smoke on Wheels BBQ, and Rob Green from Smokingpit.com.

We started off our tour watching some testing of the YS640 and YS480 pellet grills, alongside some of the competition from Green Mountain Grills and Traeger.  After watching the logging of data for about two hours, I am reaffirmed that the folks at Yoder build a superior product.  Here's some shots from the test area.

The Yoders (in the background) stacked up next to the Traeger and GMG (foreground)

Here's Joe and Andy watching the test data coming in
It was a real treat to see the attention to detail that goes into the development of the software for the Yoder pellet grills.  Joe has worked incredibly hard over the last year to fine tune all aspects of the grill.  His passion for great BBQ really shows in how the Yoder pellet grill performs.

After the watching the testing, we had the chance to see how it all comes together in their manufacturing area.  It was a great pleasure to see true American craftsmanship still exists.  Here's some shots of these pits getting assembled.

Made in the USA by American hands

Some cooking chambers ready for final assembly

Assembled grills ready for the finishing touches

Control boards...the brains of the pellet grill

All their pits are modeled in software to ensure everything goes together seamlessly

I was also able to catch a glimpse of the new Yoder Smokers charcoal grill.  The same attention to detail and craftsmanship went into this grill as with their offset wood smokers and pellet grills.  Folks that like to grill over hot coals will want to check this out when it is made available.

The Yoder Smokers charcoal grill with adjustable charcoal tray and all the cooking  surface you will ever need

Overall it was a very fun day, shared with friends with a real passion for great BBQ.  I finished off the day taking a cooking class from Andy Groneman on how to get the most out of your pellet grill at All Things BBQ.  I received some great tips and recipes for pellet grill cooking.  If you are ever in the Wichita area when he is offering a cooking class at All Things BBQ, be sure to sign up for one.  Andy has a wealth of knowledge from the BBQ circuit that will really help you step up your game when it comes to the grill or smoker.

Next time, I'll let you all know how my attempt at smoking shrimp turns out.  You definitely don't want to miss that.

Wednesday, August 3, 2011

Pork Chops with Sauteed Apples and Onions

I had the chance to try out Sweetwater Spice Company's Smoked Apple Spice Butt and Rib Bath on some pork chops.  As was the case with other Sweetwater products, this brine was no disappointment.  The Butt and Rib Bath has some great flavors in the ingredients list, like ancho chilies, cinnamon, cumin, and celery seed to name a few.

After brining the chops for 45 minutes, I grilled them up on the Yoder pellet grill until they were done to my liking.  I finished off the chops with some sauteed apples and onions.  This really complimented the pork with both sweet and savory flavors.  The chops were incredibly juice and flavorful from hanging out in the brine.  Here's how it all looked.


Stay tuned for my next post where I will detail my experiences of touring the Yoder Smokers manufacturing facility.  It was a real treat to see where some of the finest crafted smokers are born.

Wednesday, June 29, 2011

Beer Can Chicken

It's been a while since I've posted anything, but don't fear.  I'm back to smokin' up something after recovering from some graduation parties I catered for my family.  For this post, I'd tried my hand at a beer can chicken using Sweetwater Spice Company's brisket bath as a brine.  Here's some pictures of the process.

The chicken bathing away.

The chicken smoked on the Yoder at 250 until the breast registered 160 degrees.  Here it is taking on some smoke.


The stand is Steve Raichlen's Beer Can Roaster.  This is a great stand that keeps the chicken upright and provides a container that allows you to use whatever liquid you would like if you don't want to use beer.  For mine, I used some white cranberry peach juice which gave me excellent results.  The chicken turned out very moist and flavorful.
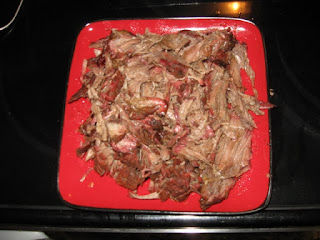
For leftovers, here's a great panini sandwich recipe you can try.  Warm up some of the leftover chicken with your favorite BBQ sauce.  Put a pile of chicken on some fancy bread with some caramelized onions and some cheese, and grill that panini style for an excellent sandwich.  Enjoy and we'll see you next time!

Tuesday, May 24, 2011

Sweetwater Spice Company's Brisket Bath

I had a great opportunity to try a Sweetwater Spice Company's Brisket Bath instead of using a traditional dry rub.  The Brisket Bath is a brine using ancho and chipotle chilies, apple juice, black pepper, brown sugar, onion, garlic, tamarind paste and a hint of cinnamon.  This mixture is ultra concentrated, requiring a 3:1 ratio of water to Brisket Bath per every 5 lbs of meat.  For this smoke, I used a 5lb brisket flat.  Here's a look at the process.


Brisket Bath!


The brisket bathed for five hours


Here it is after coming off the Yoder.


All sliced and ready for consumption!


The Brisket Bath made a very moist and flavorful brisket.  This was a great change of pace from the traditional dry rub technique that I usually use.  I would recommend giving this a try if you get the chance.  You can pick some at All Things BBQ or directly from Sweetwater Spice.

Sunday, May 8, 2011

Review of the Home Tech Flavor Injector

I recently had the privilege of testing out the Home Tech Flavor Injector.  The device is certainly a unique design compared to the standard injector that most folks are accustomed to seeing.  Here's a few pics.


Cupcakes!  Gotta try that!


Three injection needles instead of one.  Each exit has screen to prevent clogging.

For my review I started off by injecting a chuck roast with some of my brisket mop.  The Flavor Injector did an admirable job injecting the chuck roast.  There was a bit of a learning curve with knowing when to release the press pressure in the reservoir so not to spray your injection everywhere.  After smoking it up on the Yoder, I was left with a very moist and flavorful helping of pulled beef.  I was very pleased with the results.

Getting ready to inject.
Adding injection is a lot neater than a traditional injector
Injecting away!

A fine batch of smoked, pulled chuck roast!

The the next round of testing I had to give the injected cupcakes a try.  I baked up some traditional yellow cupcakes and tried injecting them with hot fudge.  Here's some pictures of that process.


The fudge was a bit of challenge as it was still very thick, even when heated up.  This made the injecting process a bit cumbersome.  In my opinion the injection needs to be thinned down to allow it to flow better through the injector.  Overall, I think the injector faired very well with watery-consistency injections, but struggled with thicker injections, so those should be thinned out before attempting.

Monday, April 25, 2011

Pellet Fired Crab Cakes

Whenever my business travels take me to Baltimore, MD, I am always on the lookout for a great crab cake.  I haven't been in over a year, so I've been having a craving for some good crab cakes.  This time around I'm baking them up on the Yoder pellet grill.  Here's the recipe that I use:

16 oz. Jumbo Lump Crab Meat
1 tsp. Old Bay Seasoning
2 eggs
2 tsp. Worcestershire Sauce
1/4 tsp. Dry Mustard
2 Tbsp. Mayo
1 tsp. Lemon Juice
1 Tbsp. Mustard
1 Tbsp. Melted Butter
1 tsp. Parsley Flakes
1/2 c Ritz Crackers, finely crushed.

Combine all the ingredients except the crab meat.  Fold in the crab meat, gently, so not to break up the lumps of crab meat.  Shape into cakes.  I baked these on the pellet grill at a grate temp of 375 until the internal temp was 165 degrees, maybe 15 minutes or so.  You can certainly pan fry them or broil them in the oven.  The pellet grill gave them a nice kiss of wood-fired flavor.  Here's a few pics of the process.

The crab cake mixture ready for forming into cakes

Baking away on the Yoder.  I used a Weber grill pan to make it easy getting the cakes off the grill.

The finished crab cakes.  They had a great wood-fired flavor!

Be sure to stay tuned for my review of the Home Tech Flavor Injector.  In the mean time, keep on smokin'!

Sunday, April 17, 2011

Smoked Gyros

I was feeling a little creative this past weekend so I tried my hand at smoking up some gyros.  The recipe I used was courtesy of Alton Brown at Food Network.  Check the recipe here:

Alton Brown's Gyro Recipe

The only variations I made to the recipe was that I used one pound ground lamb and one pound ground chuck instead of going all lamb.  I smoked the gyro loaf fatty style at 250 until it reached an internal temp of 165.  Here's some shots of the process.

Gyro meat smokin' away on the Yoder

Slicing some gyro meat! Check out that smoke ring!

Gyro with tzatziki sauce, lettuce and tomato, wrapped in pita 

This was a great recipe and one that I will definitely make again.  I would recommend trying this one if you are looking to smoke up something besides the usual BBQ fare.

Saturday, April 2, 2011

Yoder YS640 Testimonial for ATBBQ

As I have mentioned before, I recently had a great opportunity to share my experiences cooking on the Yoder YS640, with the folks at All Things BBQ for a testimonial video.  There was a lot of effort that went into this and I really appreciate the opportunity to help my friends out.  They were recording the entire BBQ experience from almost sun up to sun down.  I smoked a brisket, some ribs, and some hot links for the event.  Here's some shots of the day.

Lights, camera, the whole works for capturing the BBQ experience on the YS640

Trying to do an interview outside, but the audio just wasn't quite right

Capturing the moment of the saucing of the ribs.  Truly epic!

The indoor interview.  This is the one that was used in the video.

Don, Neil, Justin, Myself, and my apprentice Aaron, in it for the long haul

It was certainly a long day, but definitely a blast.  Justin and Neil did an outstanding job with the video and were a joy to work with.  Without further ado, here's my video debut...